| Last Post |

Nicholas Adams
|
|
2/26/2024 7:12 PM

|
Mauricio added some relays a few years ago. There may be a good spot to tap off there. I belive it is by the stepper controllers towards the rear of the machine.
|
|
|
|

Grant Fraser
|
|
2/26/2024 1:17 PM
|
I've thought out the problem. The outlet on the laser cutter is GFCI protected. I just need a relay inside the machine to communicate with the panel.
|
|
|
|
Nicholas Adams
|
|
2/26/2024 7:20 AM
|
Sorry to hear the Grant. Thank you for your work on this project. We all know how frustrating it can be whenthings dot go to plan. It is looking good so far!
|
|
|
|
Grant Fraser
|
|
2/25/2024 7:35 PM
|
The relay project didn't go as planned.
For now the fans and chiller are connected to the fan switch on the wall.
To send power to the laser press the big green start button on the panel. Push stop when you are done. The indicator light doesn't work yet. Wrong voltage. It needed to be 120v.
There is a micro switch on the wall that can control the air solenoid.
|
|
|
|
Nicholas Adams
|
|
2/22/2024 9:54 PM
|
I will be in and out tommorow. I hope to get the compressor in sometime, but no guarantees. I would like to get the insulation and vapor barrier in before the compressor goes in. There are some precut pieces for the roof in the woodshop. We will need another batt of Safe and Sound. I will pick it up in the morning. I will use the rest around the furnace later on.
The laser should be ready to go. It just needs a usb connection between the computer and the main board on the laser until I can get the networking sorted out.
|
|
|
|
Torsten Rothbart
|
|
2/22/2024 7:56 PM
|
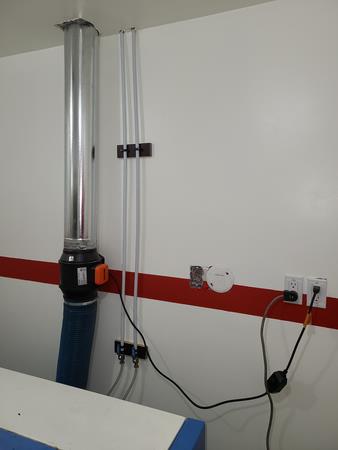
Secondary regulators are installed for the paint and laser areas, and the air system seems to be holding pressure. I have not adjusted the regulators yet, and I'm not sure what the final configuration of moisture trap and valves at the compressor will be - though it seems like Grant has a plan.
Grant was completing the wiring for the compressor when I left, hopefully we can move it into Nicholas' lovely shed tomorrow. What's the status on the laser itself? I see the bearing is in, do we need additional work on it before we start to use it?
|
|
|
|
Nicholas Adams
|
|
2/20/2024 8:04 PM
|
Was nice seeing you at the space. The air system is looking good! I have the bearings in hand and will try them tommorow.
|
|
|
|
Torsten Rothbart
|
|
2/20/2024 2:38 PM
|
Sounds good, I'll start on it this afternoon
James mentioned you might have ordered the bearing already - I asked a couple places in town about them and they can bring them in next day, but if you already bought some I'll hold off
|
|
|
|
Nicholas Adams
|
|
2/19/2024 7:11 PM
|
We do have a small compressor. I poured the slab for the big compressor today. It may take a couple days to cure due to the temperature. I also picked up the materials to build a shack around it. The compressor will be beside the exterior door if you would like to get a start on plumbing.
|
|
|
|
Torsten Rothbart
|
|
2/19/2024 10:27 AM
|
Very nice cover! haha
Do we have a small air compressor in the space? I can bring mine in for now while we get the big compressor set up/
For the large compressor, I grabbed the rigid air line set that was on sale at KMS and was planning on routing air supply from the northeast corner of the woodshop along the walls or ceiling to the laser room and the paint booth. We can have the main regulator at the compressor for pneumatic tool pressures, then use secondary regulators at the paint booth and laser.
I thought I might put a single outlet centrally on the woodshop ceiling with intentions to put a hose reel or coiled air hose at a later date for ease of use.
|
|
|
|
Nicholas Adams
|
|
2/19/2024 9:32 AM
|
It was not a priority, however, I was having fun. Here is the cover for the computer button. 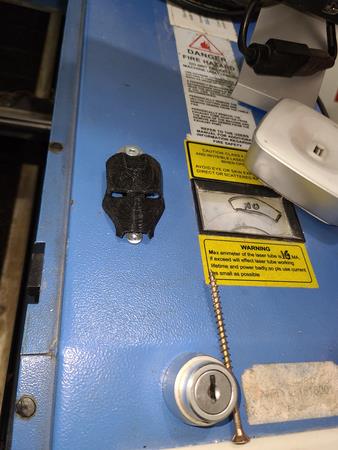 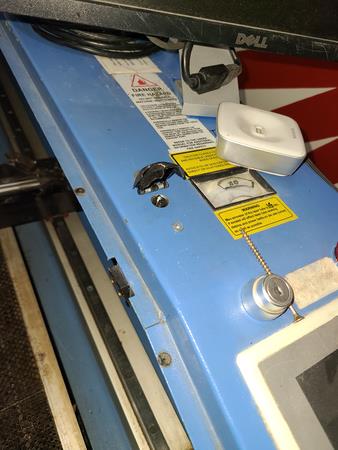
|
|
|
|
Nicholas Adams
|
|
2/18/2024 9:46 AM
|
The old laser computer has been put into the laser. It fit nicely beside the controller board. A remote power switch has been added by the key switch. I will be 3d printing a cover for it so it does not accidently get turned off. The monitor has been placed in the old location. It is hooked to usb so the ports on the side of the monitor can be used for usb sticks etc. Keyboard and mouse are set up as before.
I have not tested it with the laser yet, as I discovered a missing bearing in the drive for the X axis drive. James measured it up and I have ordered a replacement. This is likely the culprit for the misaligned ends on circles.
I am part way through building the doors and turning my focus to getting the air compressor installed.
|
|
|
|
Grant Fraser
|
|
2/14/2024 5:51 PM
|
Any small compressor would work. The extra moisture traps can be added later if needed. The trap also included a regulator for consistency.
There should be a dedicated computer and monitor set up. There are 4 outlets next to the door for this purpose.
|
|
|
|
Torsten Rothbart
|
|
2/14/2024 5:37 PM
|
ALSO - what's left to set up? Other than the doors, I imagine we still need the compressor hooked up and a line routed for the air assist? I seem to recall we had a extra regulator and an inline moisture trap, but I only got to use the laser once in the previous space so my memory is a bit foggy.
|
|
|
|
Torsten Rothbart
|
|
2/10/2024 5:09 PM
|
Awesome, looks great!
How has the performance been with test cuts?
|
|
|
|
Nicholas Adams
|
|
2/9/2024 7:24 PM
|
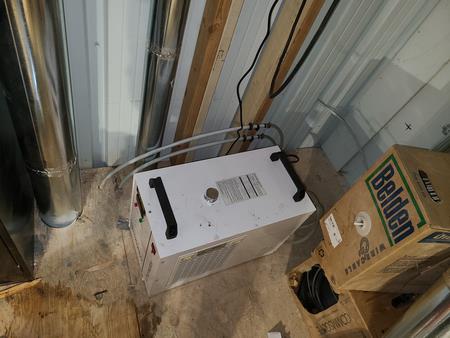
Chiller has been moved. 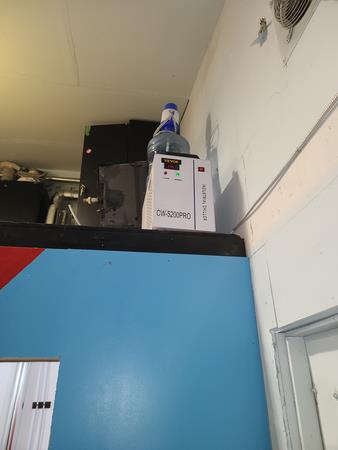
|
|
|
|
Grant Fraser
|
|
2/7/2024 3:14 PM
|
|
|
|
|
|
Nicholas Adams
|
|
2/7/2024 1:40 PM
|
I have plumbed the chiller. I noticed the comments about putting it on the edge after. I will move it.
|
|
|
|
Torsten Rothbart
|
|
2/6/2024 8:23 PM
|
Either/or, the mezzanine edge seemed like a good solution to see the current temp.
|
|
|
|
Grant Fraser
|
|
2/6/2024 9:24 AM
|
We were looking at putting it on the edge of the mezzanine. The display would have been visible from the laser doorway.
If we put it in the room maybe high on the wall? Have to consider head clearance vs tripping hazard.
|
|
|
|